Guide to Creating an App in Azure with Mail and Business Central Permissions
This guide walks you through the steps to register an app in Azure with the permissions needed to read mail and to read/write in Business Central. If you plan to create separate apps for testing and production, repeat this process for each and name the apps accordingly.
Go to Azure Portal
- Open your browser and navigate to https://portal.azure.com/#home
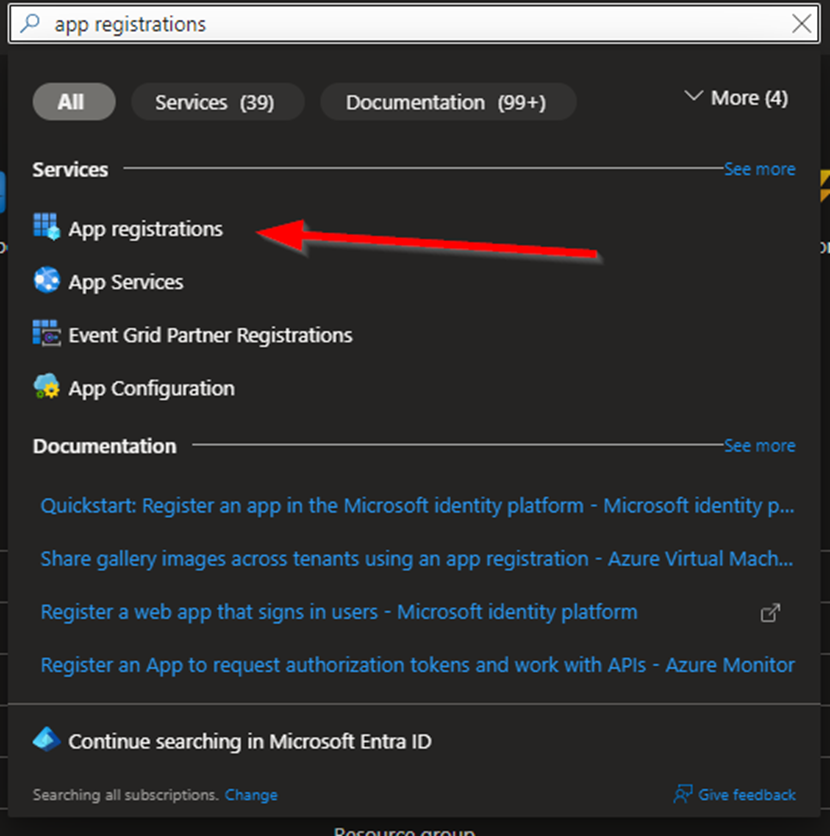
- In the search bar, type “App registrations” and select it.
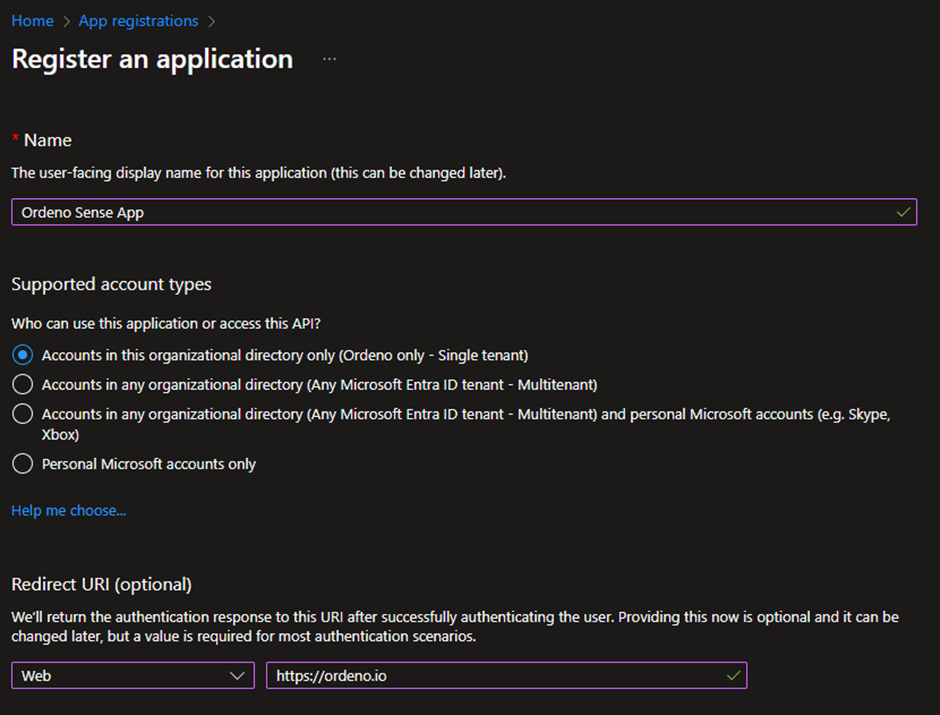
2. Register a New App
- Click on “New registration.”
- Enter app name (e.g., “Ordeno Sense App”).
- Complete other necessary fields and click “Register.”

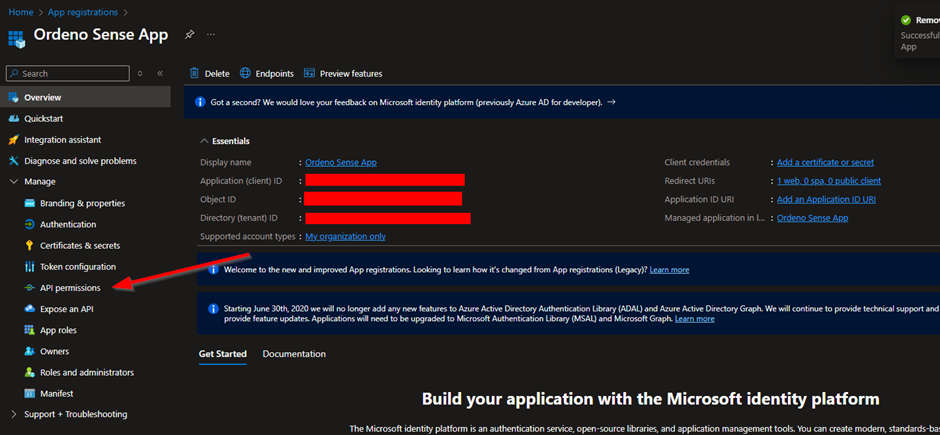
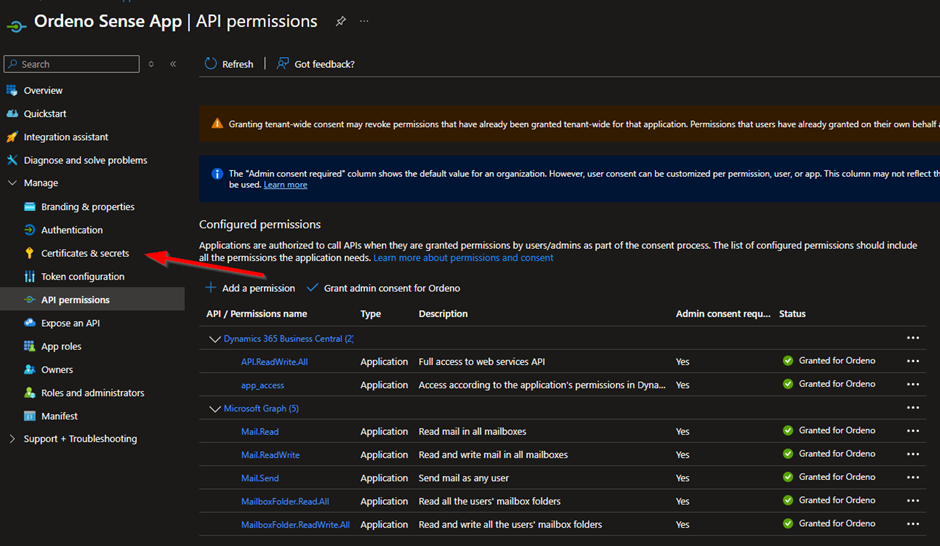
3. Configure Microsoft Graph API Permissions
Once registered, go to API permissions in the app settings.
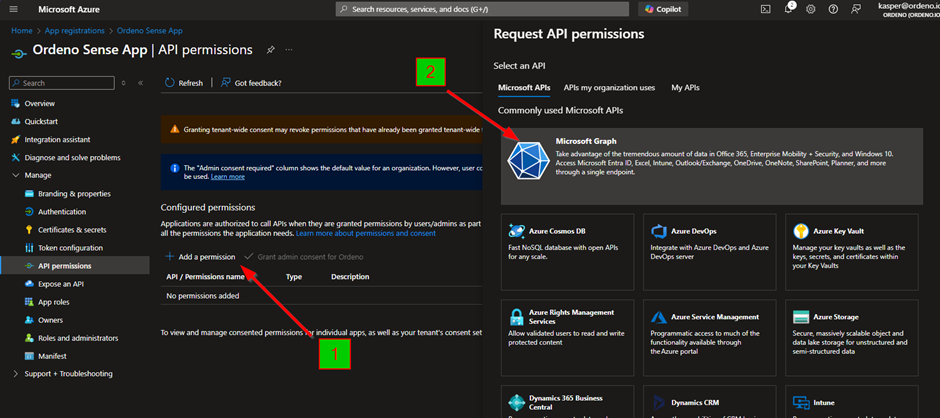
Click “Add a permission” and select Microsoft Graph from the sidebar.
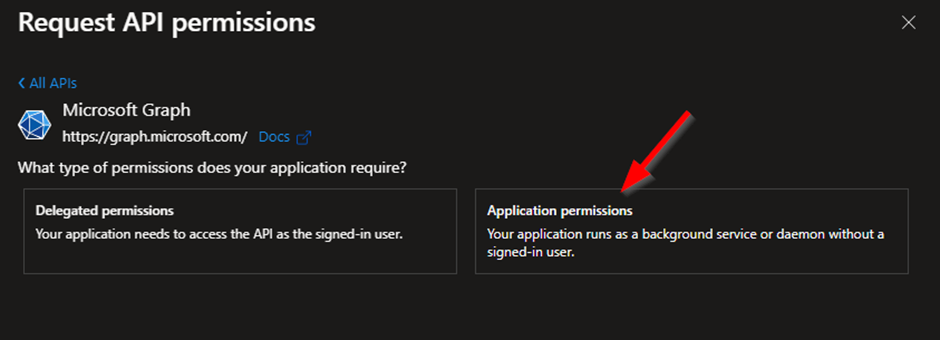
Choose Application permissions (since the app accesses the API independently, without a signed-in user).
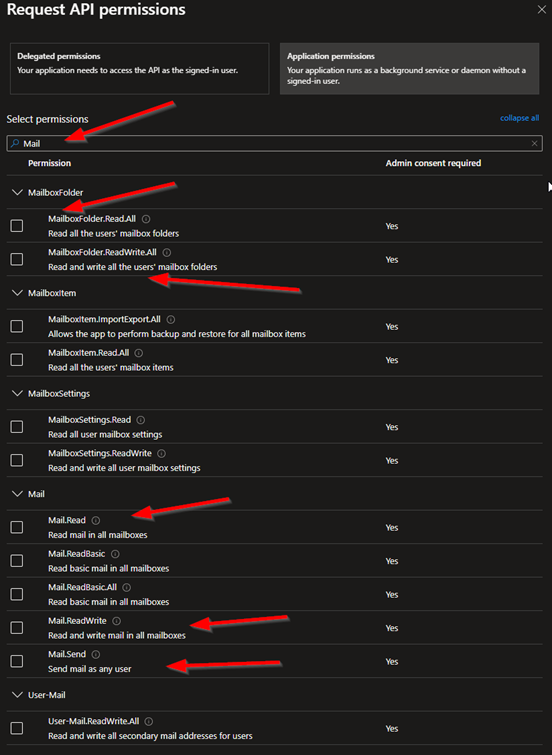
Select the following permissions (these permissions should match the visual example provided)
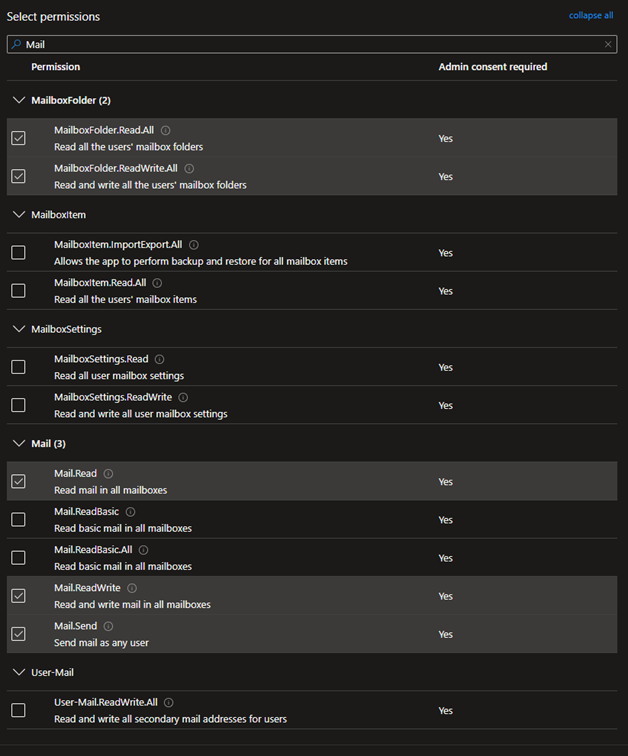
When these permissions are selected click ”Add permissions”
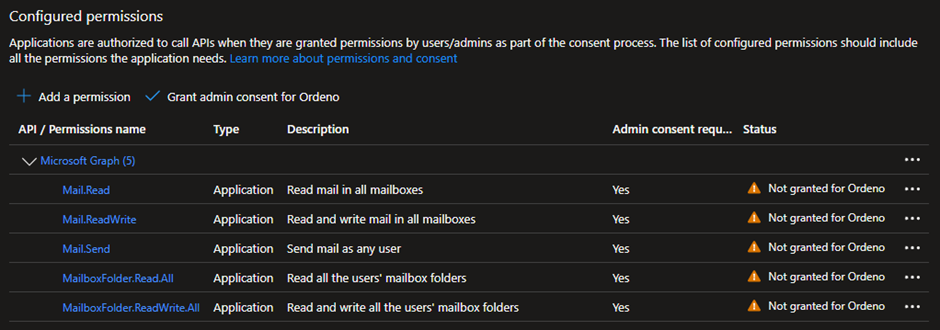
The permissions on the app now looks like this
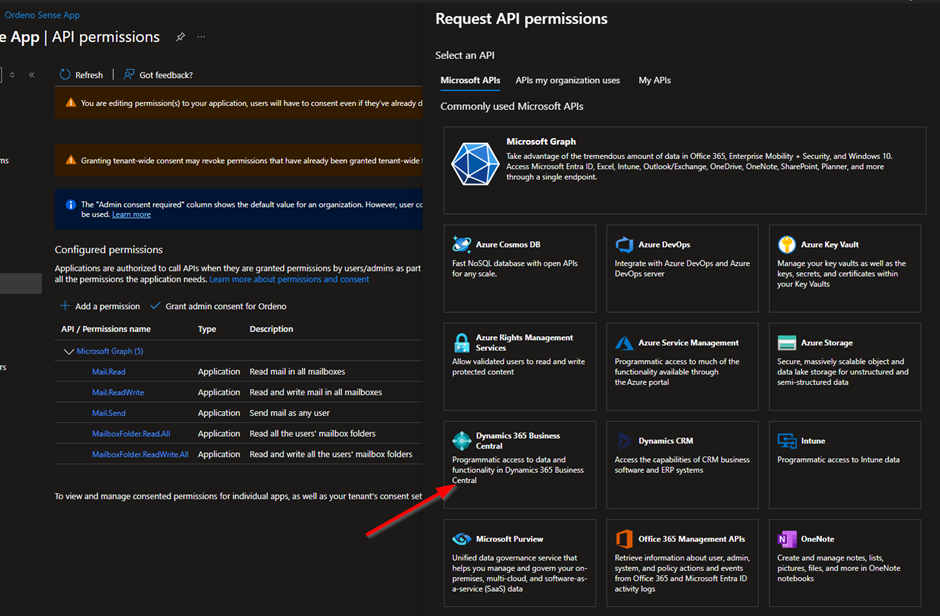
Add Dynamics 365 Business Central Permissions
Click “Add a permission” again, then select Dynamics 365 Business Central.
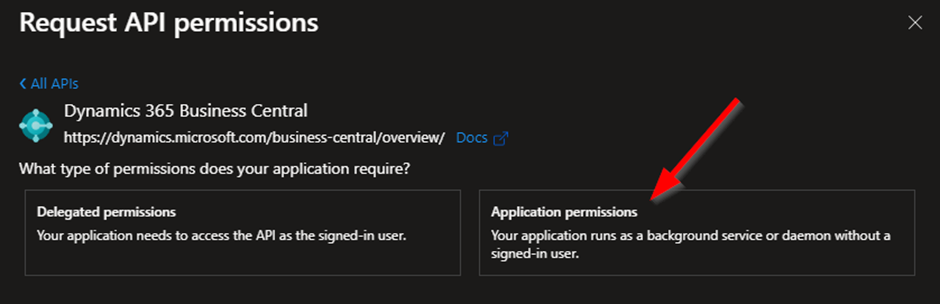
Choose Application permissions.
Select:
- App_access
- API.ReadWrite.All
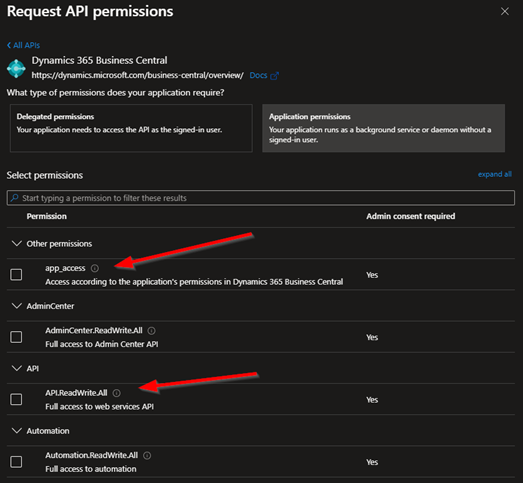
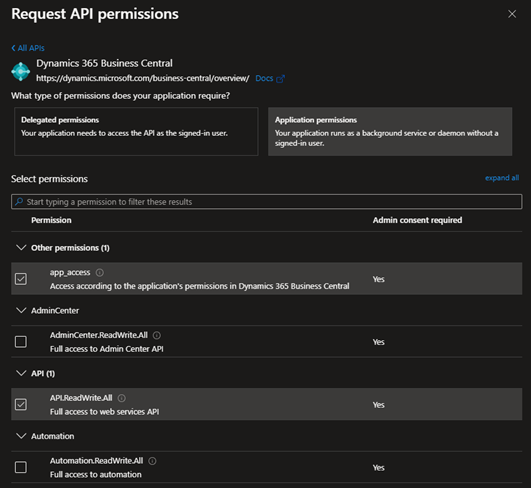
Click “Add permissions” to apply.
Click ”Add permissions”
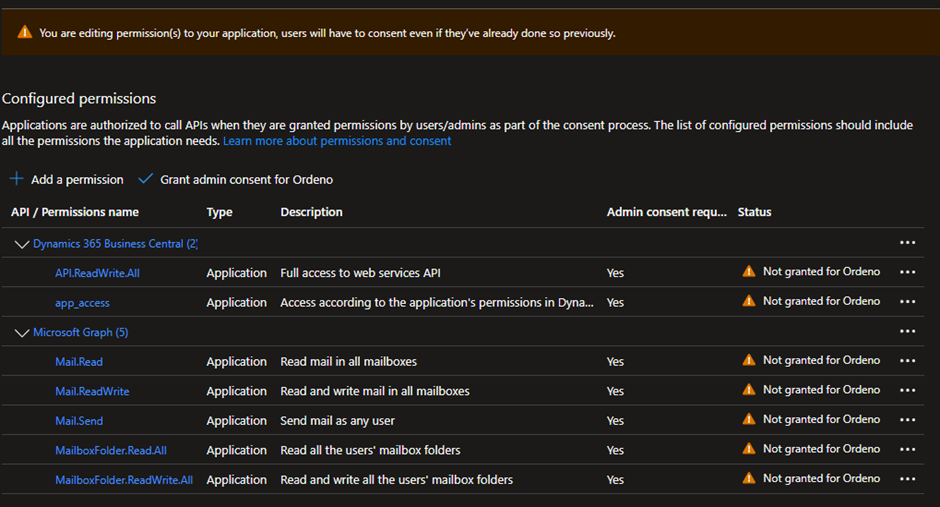
The complete overview of the permissions now looks like this
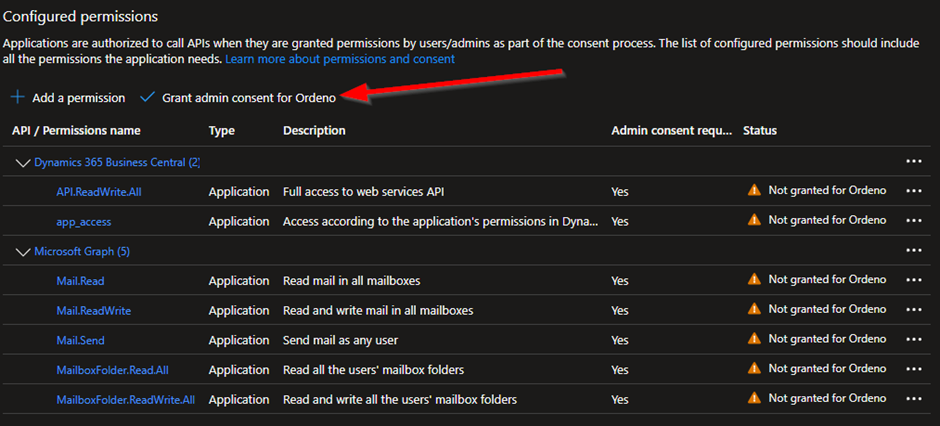
Grant Admin Consent
To finalize permissions, click on “Grant admin consent for [company name]” at the top of the API permissions page.
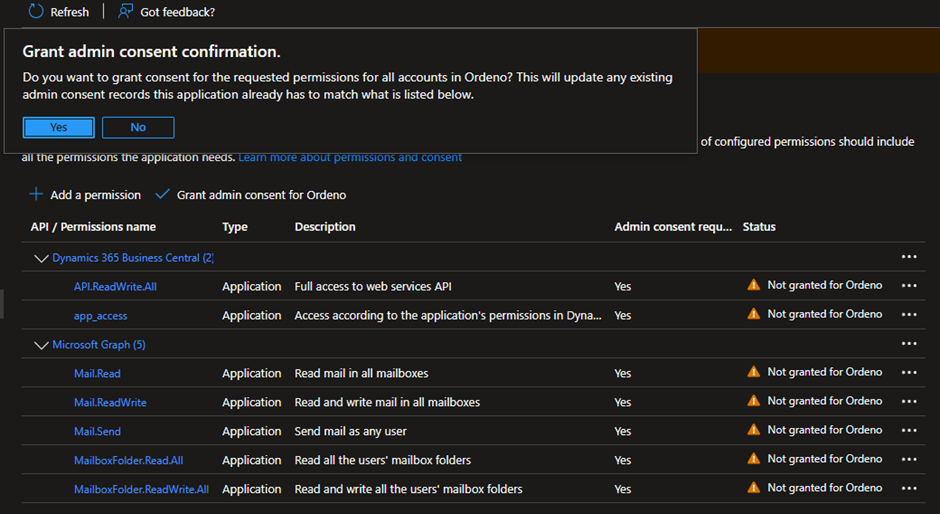
Confirm the action by clicking ”Yes”
Verify that all permissions show a checkmark to confirm they’re successfully granted.
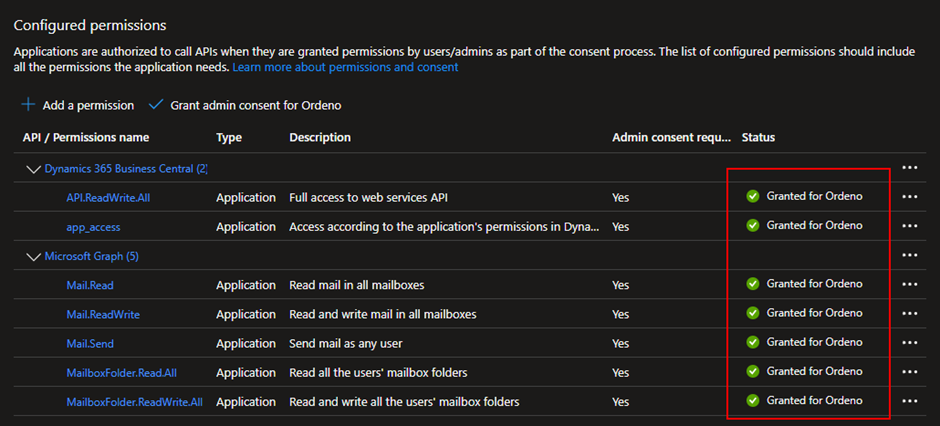
Then for Ordeno Sense to use the app there needs to be added some client secrets
Create Client Secrets
Navigate to Certificates & secrets in the app settings.
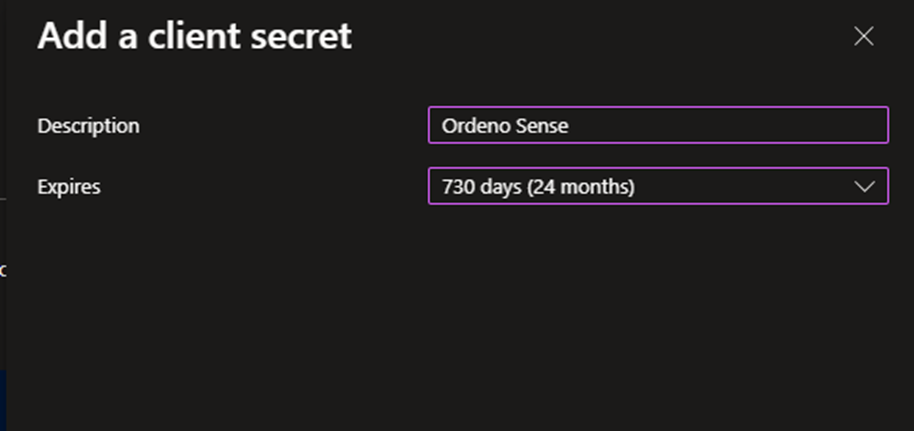
Click ”New client secret”

In the description field, enter “Ordeno Sense” and set the expiration to 730 days (24 months)
Copy the “Value” and “Secret ID” to a text file for safekeeping.
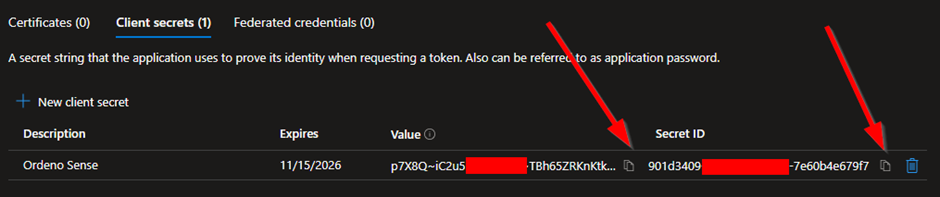
The textfile will look like this

Retrieve and Save Client ID and Tenant ID
In the Overview section of your app, copy the Client ID and Tenant ID into the same text file where you stored the client secret information.
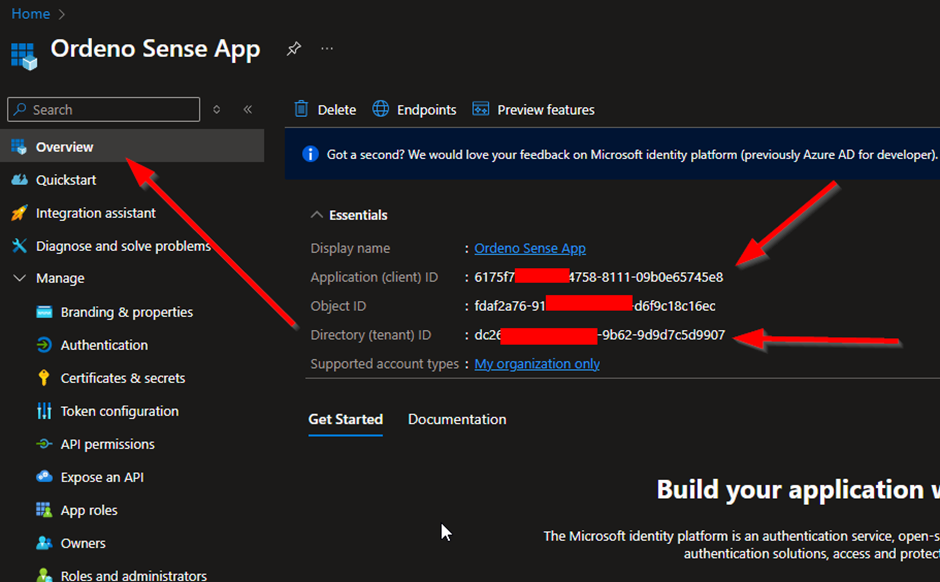
After the new values are copied into the text file it now look’s like this
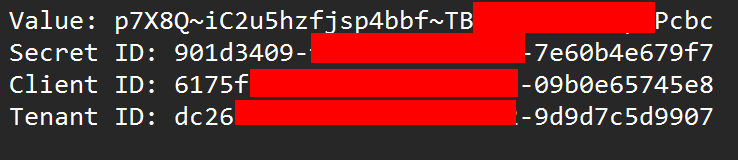
Save and Send the Credentials
- Your text file should now include the following details:
- Client ID
- Tenant ID
- Secret Value
- Secret ID
- Once all values are recorded, send the text file to support@ordeno.io.

Ordeno
#inputmanagement
Dalumvej 16, 5250 Odense SV
+45 92909100
info@ordeno.io
44179717 (CVR)